Accept crypto in your WooCommerce store
This takes about ten minutes and needs no coding. You’ll add a plugin to WordPress, copy two things across from PaySovra, and place one test order to prove it works. When a customer pays, the money goes straight to your own wallet and the order marks itself paid.
- A WordPress site with WooCommerce already installed.
- A PaySovra account with at least one wallet address saved — that’s where your money lands, so nothing works without it.
- Somewhere safe to paste two secrets for a minute, like a notes app.
Download the plugin
Save the file somewhere you’ll find it again, like your Downloads folder.
.zip exactly as you downloaded it and unpacks it for you. If you’ve already double-clicked it and a folder called paysovra appeared beside it, nothing is broken: drag that folder to the trash and carry on with the .zip.Install it in WordPress
In your WordPress admin, go to Plugins → Add New Plugin, then press Upload Plugin at the top of the page. Choose the file you just downloaded, press Install Now, and when it finishes press Activate Plugin.
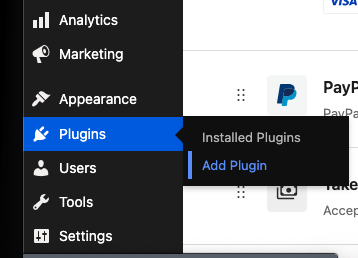
Nothing visible changes yet. The plugin is waiting for the two secrets you’re about to create.
Create your integration key
This is what lets your store ask us to take a payment. In PaySovra, open Integrations and find Integration keys. Name it something you’ll recognise later, like “WooCommerce store”, and leave management access switched off. Press Create key, then copy the key it shows you.

Leaving management access off matters. WordPress sites get broken into more than anything else on the web, and a payments-only key can take payments but can’t read your orders, your customers, or anything else about your business. If your site is ever compromised, you revoke that one key and the rest of your account is untouched.
Create your signing secret
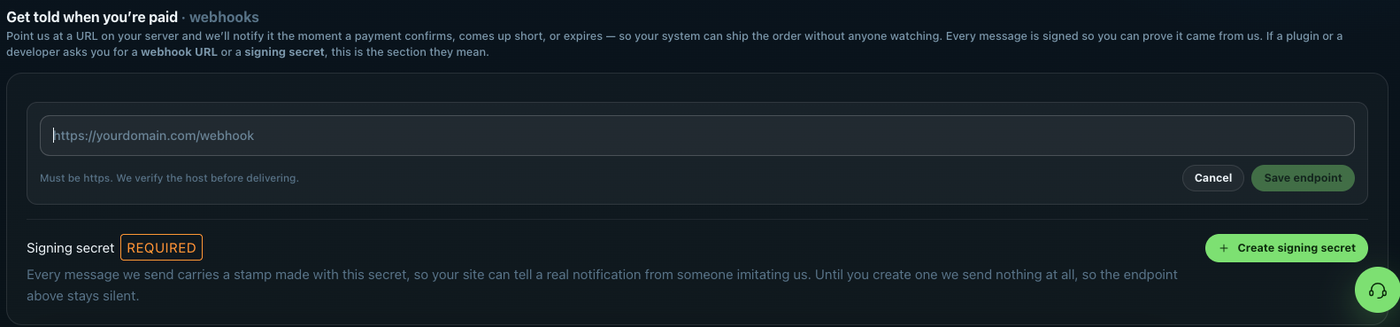
This is how your store can tell a genuine message from us apart from someone pretending to be us. On the same Integrations page, scroll to Get told when you’re paid and press Create signing secret. Copy it — this one is also shown only once.
Tell us where your store is
Still under Get told when you’re paid, press Add endpoint and enter your store’s address followed by /?wc-api=paysovra. So if your shop is at shop.example.com, you would enter:
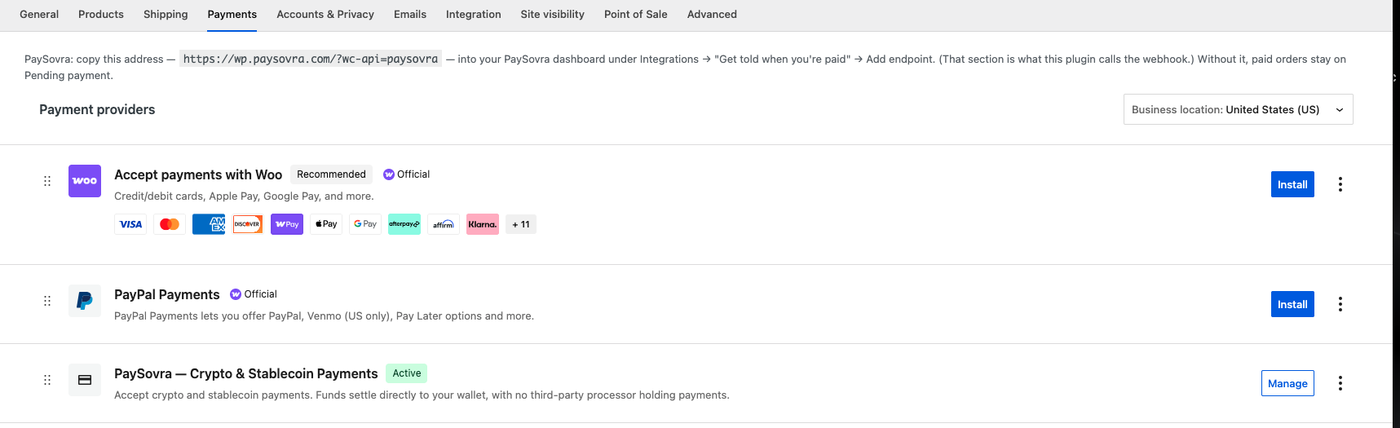
https://shop.example.com/?wc-api=paysovraPress Save endpoint. If you’d rather not type it by hand, the exact address for your store is also printed at the bottom of the WooCommerce payments settings page in the next step — you can copy it from there.
Paste both secrets into WooCommerce
Back in WordPress, go to WooCommerce → Settings → Payments. You’ll see PaySovra — Crypto & Stablecoin Payments in the list. Press Manage next to it.
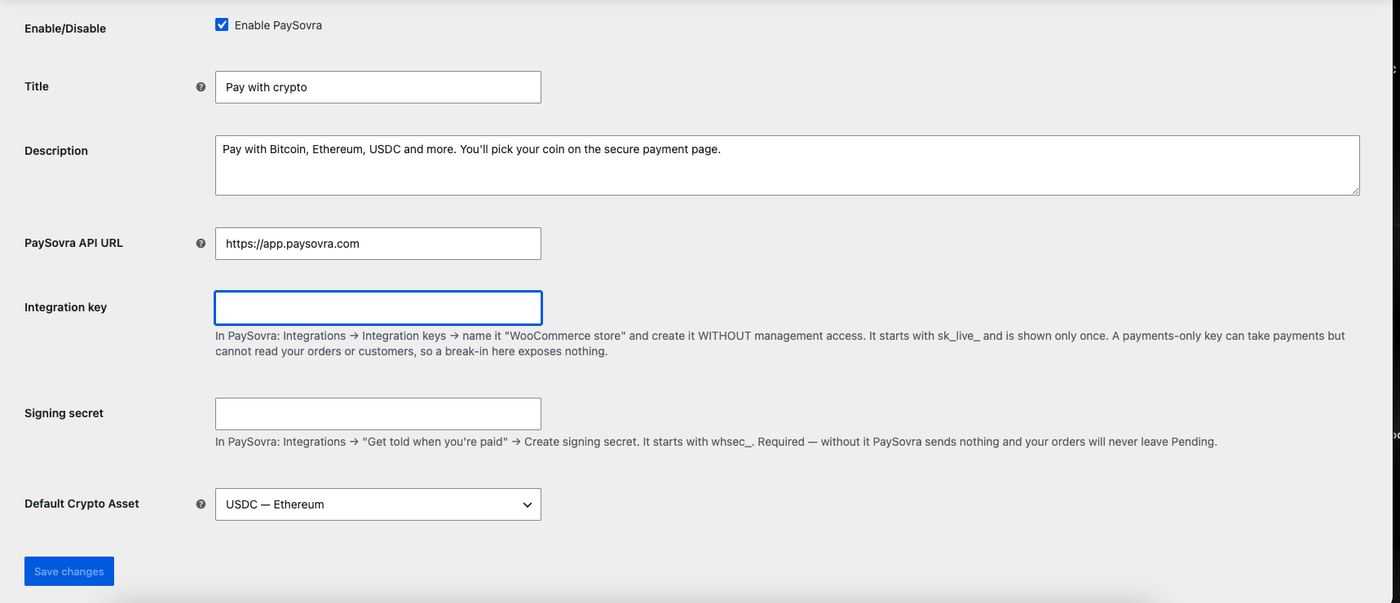
Fill in the two fields you copied: your Integration key from step 3, and your Signing secret from step 4. Then tick Enable PaySovra and press Save changes.
There's nothing to choose about coins here — your customer picks their own coin and network when they pay, from whatever your account accepts.
Place one test order before you tell anyone
Buy something from your own shop, cheaply, and pay it for real. Watch that all four of these happen:
- PaySovra appears as a payment option at checkout.
- Pressing it opens a payment window where you choose your coin and network, then shows an address and an amount.
- After you send the coins, the payment page confirms on its own.
- Back in WordPress, the order has moved from “Pending payment” to Processing or Completed, with the transaction recorded in the order notes.
If the first three work but the order stays on “Pending payment”, the problem is step 4 or 5 — see below. Your money is never at risk in that situation, because it went directly to your wallet; it’s only the notification that got lost.
If something goes wrong
Almost every problem is one of these six.
Keeping it safe
If your WordPress site is ever hacked, or you stop using it, go to Integrations in PaySovra and revoke that one integration key. Your store stops taking payments immediately and nothing else you’ve connected is affected. Replacing the signing secret works the same way — press Replace, then paste the new one into WooCommerce.
Your wallet keys are never involved in any of this. We never hold your money and we can’t move it; payments go from your customer to your wallet directly, and what you’ve set up here only lets your store ask us to watch for one.